
Why air fryers work for meal prep
Air fryers are more than just a way to make frozen fries. They're actually the fastest way to get through a Sunday meal prep session without heating up the whole house. If you're tired of soggy microwave leftovers, using the air fryer to batch cook proteins and vegetables keeps things crisp for days.
A common concern is capacity. Early models were small, limiting batch cooking. But the market has responded. We’re now seeing air fryers with 10-quart or even larger baskets, alongside models with multiple compartments, making significant meal prep feasible. The technology itself has also improved; modern air fryers often include more precise temperature controls and pre-set programs, taking the guesswork out of cooking.
The benefits extend beyond speed. Air frying uses significantly less oil than traditional frying, offering a healthier alternative without sacrificing flavor. Batch cooking with an air fryer also drastically reduces cleanup. One appliance, one basket, less mess. Controlled portions are another advantage. Pre-portioned meals help with mindful eating and support health goals. It’s a complete system for taking control of your diet.
Air frying isn’t replacing conventional ovens, but it's becoming a vital complement. It excels at tasks where speed and crispness are paramount – reheating leftovers, roasting vegetables, cooking proteins – freeing up oven space for more complex dishes. This synergy makes it an invaluable tool for the modern home cook.

Picking the right size
Let’s be honest: not all air fryers are created equal. A 2-quart model is fantastic for a single person, but it won’t cut it for a family of four prepping meals for the week. Understanding your needs and choosing an appropriately sized air fryer is the first step. Don't fall for the trap of thinking 'bigger is always better', though. A partially filled large air fryer isn't much more efficient than a fully loaded smaller one.
Maximizing space within any size air fryer comes down to technique. Layering is possible for certain foods—like chicken nuggets or french fries—but avoid overcrowding. Overcrowding leads to steaming instead of crisping, defeating the purpose of air frying. Cook in multiple batches if necessary. It's better to have slightly more work than to end up with soggy food.
Larger capacity air fryers (8 quarts and up) are a boon for serious meal preppers. They allow you to cook larger portions of protein and vegetables at once, significantly reducing cooking time. Some models also feature dividers, enabling you to cook multiple components of a meal simultaneously. However, these models often come with a higher price tag and require more counter space.
- 2-4 Quart: Good for one person or small snacks.
- 5-7 Quart: Suitable for small families (3-4 people).
- 8+ Quart: Best for larger families or those who frequently meal prep.
Air Fryer Size & Batch Cooking Recommendations for Meal Prep
| Air Fryer Capacity | Food Type | Recommended Batch Size | Approximate Prep Time (minutes) | Approximate Cook Time (minutes) |
|---|---|---|---|---|
| 2 Quart | Chicken Breast (boneless, skinless) | 2 pieces | 10-15 | 18-22 |
| 4 Quart | Chicken Breast (boneless, skinless) | 4-5 pieces | 10-15 | 15-20 |
| 5.8 Quart | Chicken Breast (boneless, skinless) | 6-8 pieces | 10-15 | 12-18 |
| 7+ Quart | Chicken Breast (boneless, skinless) | 8-10+ pieces | 10-15 | 10-15 |
| 2 Quart | Brussels Sprouts | 1-1.5 cups | 5-10 | 12-15 |
| 4 Quart | Brussels Sprouts | 2-3 cups | 5-10 | 10-12 |
| 5.8 Quart | Potatoes (cubed) | 3-4 medium | 10-15 | 20-25 |
| 7+ Quart | Potatoes (cubed) | 5-6+ medium | 10-15 | 18-22 |
Illustrative comparison based on the article research brief. Verify current pricing, limits, and product details in the official docs before relying on it.
25 Air Fryer Meal Prep Recipes
Here are 25 air fryer recipes perfect for meal prepping, categorized for your convenience. Cook times are approximate and may vary depending on your model. Reheating notes are included to help you maintain quality throughout the week. Remember to always check internal temperatures to ensure food safety.
Breakfast (5 recipes):
1. Egg Bites: (12 minutes, 350°F) – Great for grab-and-go breakfasts. Reheat well. 2. Breakfast Sausage: (8 minutes, 375°F) – Batch cook and add to breakfast bowls. 3. Sweet Potato Hash: (15 minutes, 400°F) – Hearty and flavorful. 4. Breakfast Burrito Filling: (Scrambled eggs, black beans, salsa – 10 minutes, 350°F) – Assemble burritos after cooking. 5. French Toast Sticks: (8 minutes, 350°F) – A fun and easy treat. Reheat in the air fryer for best results.
Lunch (7 recipes):
6. Chicken Salad (using pre-cooked chicken): (Air fry chicken 15 min, 380F) – Assemble salads with greens and your favorite toppings. 7. Salmon Patties: (12 minutes, 375°F) – A healthy and quick option. 8. Turkey Meatballs: (10 minutes, 375°F) – Perfect for meal prep bowls or subs. 9. Quesadillas: (5 minutes, 350°F) – Quick and customizable. 10. Falafel: (12 minutes, 400°F) – Serve in pita bread with hummus. 11. Shrimp Scampi: (8 minutes, 400°F) – Toss with pasta after cooking. 12. Chicken Wings (boneless): (10 minutes, 400°F) – Toss in your favorite sauce.
Dinner (8 recipes):
13. Lemon Herb Chicken Thighs: (20 minutes, 400°F) – Stay incredibly moist when reheated. 14. Air Fryer Steak Bites: (8-10 minutes, 400°F) – Great for stir-fries or salads. 15. Pork Chops: (15 minutes, 375°F) – Season generously for best flavor. 16. Salmon Fillets: (10 minutes, 400°F) – Flaky and delicious. 17. Cod with Roasted Vegetables: (12 minutes, 400°F) – A complete meal. 18. Tofu with Peanut Sauce: (15 minutes, 400°F) – A vegetarian favorite. 19. Air Fryer Pizza: (6 minutes, 350°F) – Use pre-made crusts for speed. 20. Shepherd's Pie (individual portions): (18 minutes, 375°F) – Assemble in ramekins before air frying.
Sides/Snacks (5 recipes):
21. Roasted Broccoli: (8 minutes, 400°F) – Perfectly tender-crisp. 22. Brussels Sprouts with Balsamic Glaze: (12 minutes, 375°F) – A flavorful side. 23. Sweet Potato Fries: (15 minutes, 400°F) – A healthier alternative to traditional fries. 24. Air Fryer Asparagus: (5 minutes, 400°F) – Quick and easy. 25. Garlic Parmesan Green Beans: (10 minutes, 380°F) – A simple and delicious snack.
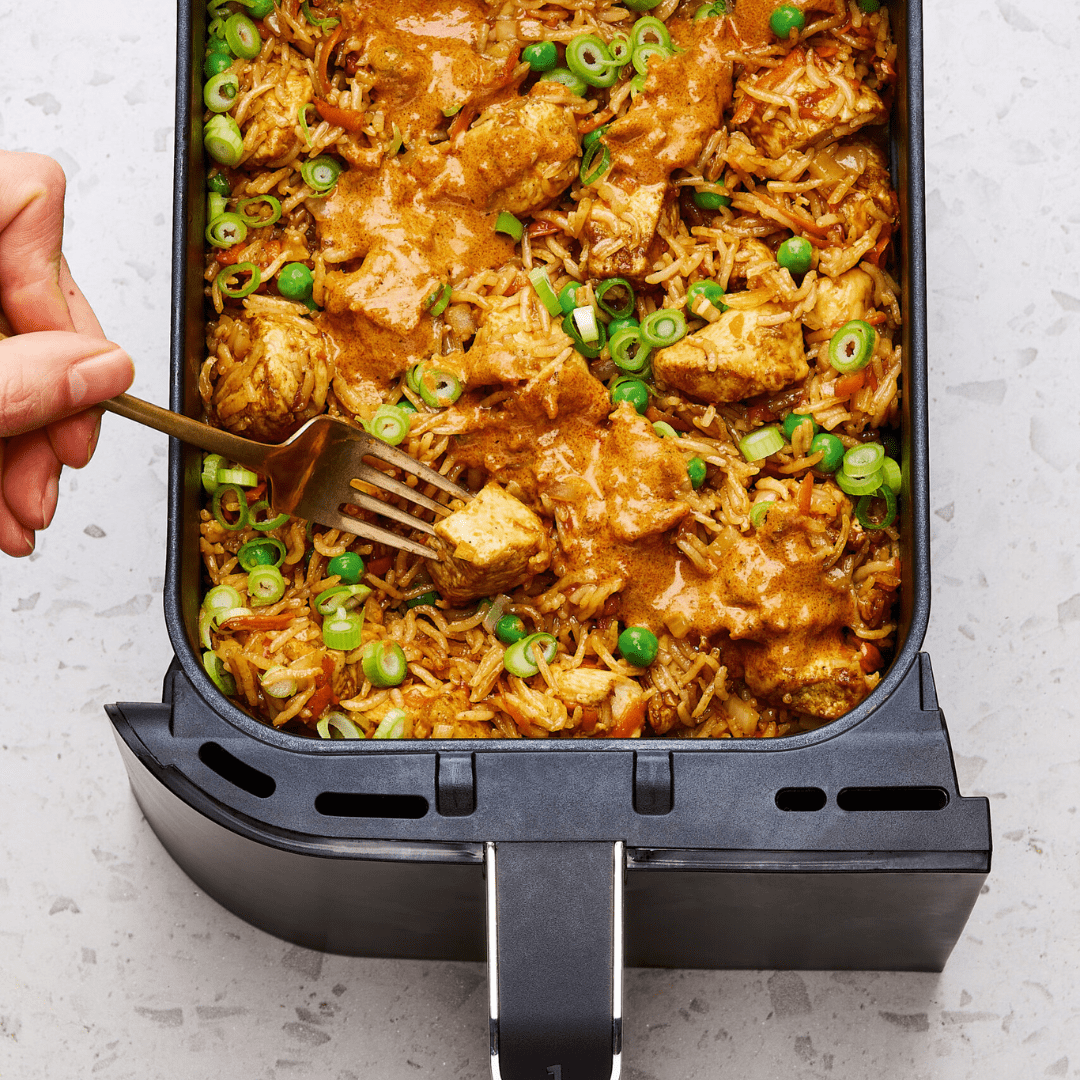
Proteins That Shine in the Air Fryer
Proteins are where the air fryer wins. You get a crust that a slow cooker can't touch, but it's faster than a standard oven. The trick is to use a meat thermometer so you don't turn your chicken into rubber.
Chicken is a superstar. Breast (165°F) benefits from a quick brine or marinade to prevent dryness. Thighs (175°F) are more forgiving and stay incredibly moist. Wings (165°F) become wonderfully crispy. Marinades with yogurt or buttermilk tenderize the meat and enhance flavor. Consider a dry rub for wings for maximum crispness.
Fish like salmon (145°F) and cod (145°F) cook rapidly in the air fryer. A light coating of oil and simple seasoning (salt, pepper, lemon juice) is often all you need. Avoid overcooking, as fish dries out quickly. Beef steak bites (135°F for medium-rare) are perfect for salads or stir-fries. Meatballs (160°F) cook evenly and stay juicy. Pork chops (145°F) benefit from a brine or marinade. Tofu (firm or extra-firm, pressed) gets wonderfully crispy in the air fryer. Marinate for at least 30 minutes before cooking.
- Chicken Breast: 165°F
- Chicken Thighs: 175°F
- Salmon: 145°F
- Cod: 145°F
- Beef (medium-rare): 135°F
- Pork Chops: 145°F
Vegetables that actually taste good
Don't limit your air fryer to frozen snacks! Vegetables thrive in the air fryer, achieving a tender-crisp texture and enhanced flavor. The key is to prevent them from drying out. A light coating of oil and proper seasoning are essential.
Broccoli and Brussels sprouts benefit from a higher cooking temperature (400°F) to achieve a slightly charred exterior. Asparagus cooks quickly (5-7 minutes) and retains its vibrant color. Peppers and onions caramelize beautifully in the air fryer, adding sweetness and depth of flavor. Sweet potatoes become incredibly tender and slightly crispy.
To prevent drying, toss vegetables with 1-2 teaspoons of oil per pound. Season generously with salt, pepper, garlic powder, and paprika. Experiment with different spice blends – Italian seasoning, Cajun seasoning, or smoked paprika. For heartier vegetables like potatoes, consider parboiling them for a few minutes before air frying to speed up the cooking process.
Grains & Starches: Air Fryer Hacks
While not the air fryer’s primary function, grains and starches can be successfully reheated or even cooked in the appliance with a little know-how. Reheating rice can restore some of its texture, though it won't be quite as good as freshly cooked rice.
Potatoes are a standout. Air fryer wedges or cubes become incredibly crispy and golden brown. Toss with oil, seasonings, and a touch of cornstarch for extra crunch. Quinoa and couscous can be air fried after being cooked, resulting in a slightly toasted texture. Spread them in a single layer and cook at 350°F for 5-7 minutes.
The biggest challenge is preventing sticking. Use parchment paper liners or a non-stick spray. Monitor closely, as grains and starches can burn quickly. Avoid overcrowding the basket, as this will lead to steaming instead of crisping. Consider using a slightly lower temperature and shaking the basket frequently.
Cleaning & Maintenance: Keep it Running
Air fryers are relatively easy to clean, but regular maintenance is crucial for optimal performance and longevity. Start by unplugging the appliance and allowing it to cool completely. The basket and crisper plate are typically dishwasher safe, but check your manufacturer’s instructions.
For stubborn grease buildup, soak the basket and plate in hot, soapy water for 15-20 minutes. Use a non-abrasive sponge or cloth to scrub away any remaining residue. Avoid using harsh chemicals or abrasive scrubbers, as these can damage the non-stick coating. A paste of baking soda and water can also be effective for removing tough stains.
Wipe down the exterior of the air fryer with a damp cloth. Pay attention to the heating element and vents, as grease can accumulate in these areas. If your air fryer has a descaling feature, follow the manufacturer’s instructions for descaling regularly. Proper cleaning and maintenance will ensure your air fryer continues to deliver delicious meals for years to come.


No comments yet. Be the first to share your thoughts!