
Make the recipe
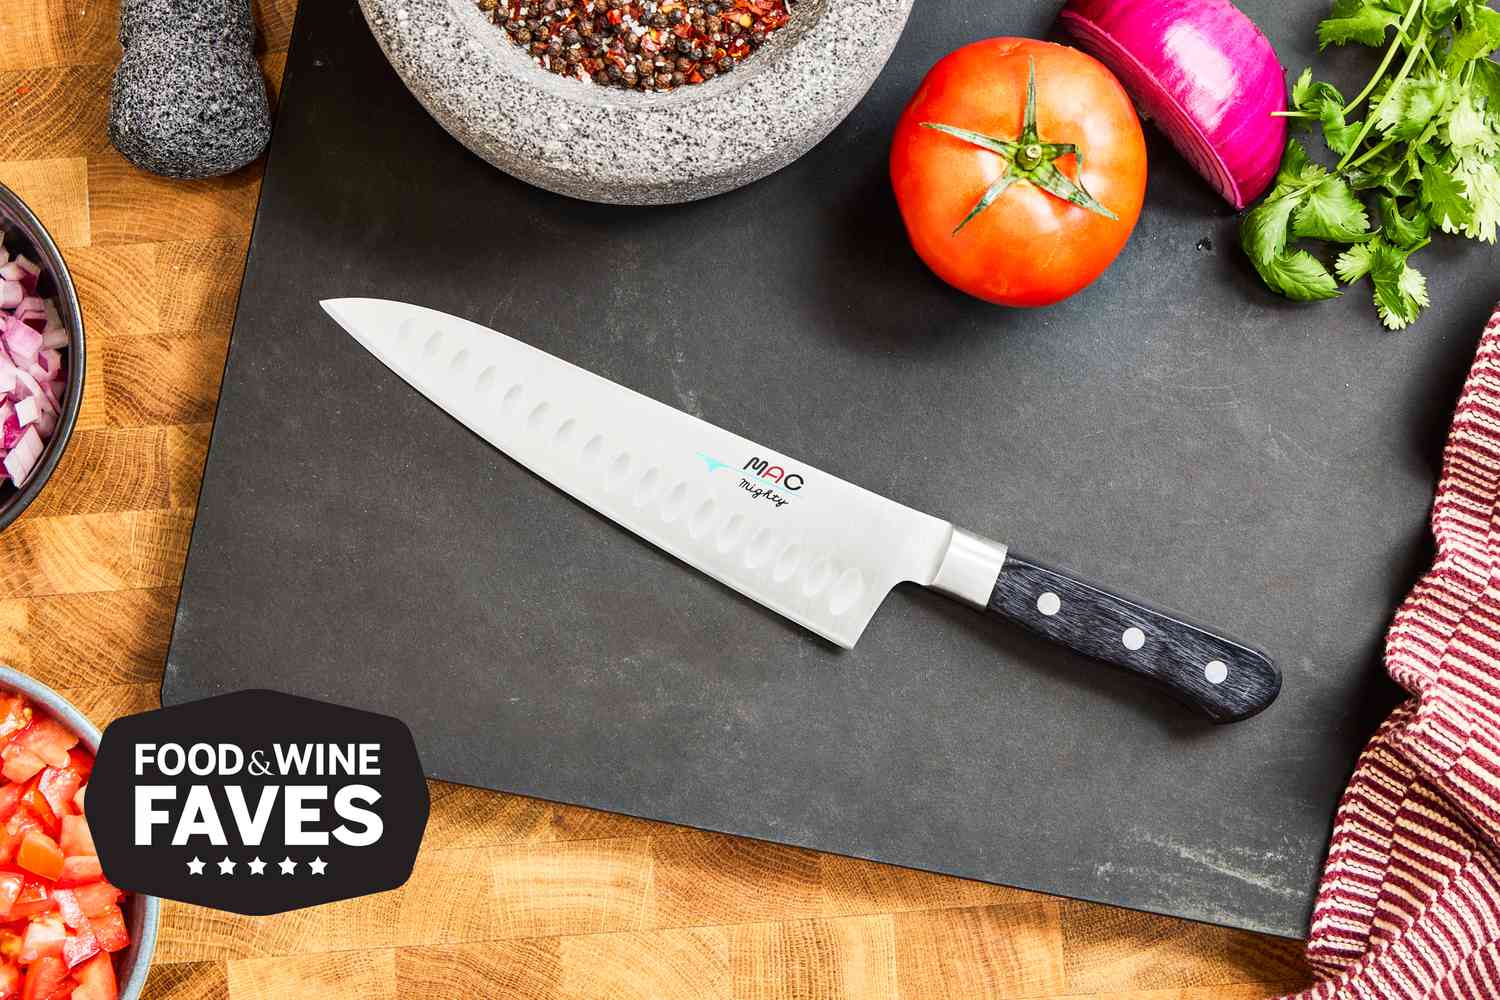
Upgrading your kitchen starts with the tools you touch every day. A reliable chef’s knife is the centerpiece of that upgrade, turning chopping and slicing from a chore into a smooth rhythm. Brands like Zwilling, Wusthof, and Shun consistently rank highest for quality, balance, and edge retention. Pairing that sharp steel with a few simple ingredients lets you practice your technique on a dish that rewards precision.
This recipe focuses on a classic vegetable stir-fry. It requires quick, uniform cuts to ensure even cooking. The goal is not just to feed yourself, but to test the knife’s ability to glide through firm vegetables without crushing them. If the blade drags or slips, it’s time to sharpen or replace.

Troubleshooting common cuts
Even the best kitchen knives require proper handling. If your slices are uneven, check your grip. Hold the handle firmly with your dominant hand and use your guiding hand to secure the food, curling your fingers inward to protect your knuckles. This "claw grip" is the standard for safety and consistency in professional kitchens.
Another common issue is slipping. If the knife slips, your vegetables might be too wet or your cutting board too smooth. Pat the produce dry before cutting. Use a cutting board with a non-slip base or place a damp towel underneath it for stability. A stable board makes the knife feel more like an extension of your hand.
Final checks before you buy
Before investing in a new knife, consider your current setup. If your existing blade is chipped or dull, a simple sharpening might suffice. However, if the balance feels off or the handle is worn, an upgrade will improve your cooking experience significantly. Look for knives with full tangs for better balance and durability.
Remember that a knife is only as good as its maintenance. Hand-wash your knives immediately after use and dry them thoroughly. Never put them in the dishwasher, as the heat and detergents can damage the blade and handle. Store them in a block or on a magnetic strip to protect the edge.
With the right knife and a little practice, you’ll find that meal prep becomes faster and more enjoyable. The precision you gain from a quality tool pays off in every dish you make.
Keep the Texture Right
The difference between a restaurant-quality dish and a disappointing home-cooked meal often comes down to moisture management and heat control. When you are using high-end tools like a Sharp Chef Knife or a Precision Stand Mixer, the technique must match the equipment's capability. A dull blade tears cell walls, releasing excess water that dilutes sauces and makes roasted vegetables soggy. Similarly, overmixing gluten development leads to tough, dry breads instead of tender crumb.
To prevent watery results, always pat proteins and vegetables completely dry before they hit the pan. Moisture creates steam, which prevents browning and steams food instead of searing it. For dishes that rely on emulsions, such as mayonnaise or hollandaise, add liquids drop by drop at the start to stabilize the mixture before increasing the flow. This slow incorporation traps fat droplets effectively, creating a thick, creamy texture that won't split or separate.
Dryness usually stems from overcooking or improper mixing. Use an instant-read thermometer to pull meats 5°F below your target temperature; residual heat will finish the cooking process while resting allows juices to redistribute. When baking, measure flour by weight rather than volume to avoid packing too much dry ingredient into the batter. If your recipe calls for creaming butter and sugar, stop as soon as the mixture looks pale and fluffy. Continuing to mix incorporates too much air, which can cause cakes to collapse and dry out in the center.
Uneven texture often results from inconsistent ingredient temperatures or poor knife work. Bring dairy and eggs to room temperature before mixing to ensure they emulsify smoothly. Cut vegetables to uniform sizes so they cook at the same rate. If you are using a stand mixer, scrape down the bowl halfway through mixing to ensure all ingredients are incorporated evenly. These small adjustments transform good ingredients into consistent, professional results.

Use paper towels to blot moisture from proteins and vegetables before cooking. This step is critical for achieving a proper sear and preventing steaming, which leads to watery, bland results.
When using a stand mixer, start on low speed to incorporate ingredients, then increase to medium. Stop as soon as the mixture is combined to avoid overworking gluten, which causes dryness and toughness.

Use a sharp chef knife to cut vegetables and proteins into consistent sizes. Uniform pieces ensure even heat distribution, preventing some items from burning while others remain undercooked or raw.
Use a thermometer to pull meats 5°F below target and let them rest. This allows juices to redistribute throughout the meat, ensuring every bite is moist and flavorful rather than dry and stringy.
Swaps that still work
When a recipe calls for an ingredient you don’t have on hand, the goal is to maintain the intended texture or flavor profile without ruining the dish. Not all substitutions are created equal; some mimic the original perfectly, while others change the outcome in noticeable ways. Use this comparison to decide which swap fits your current meal.
| Original Ingredient | Best Substitute | Ratio | Result |
|---|---|---|---|
| All-Purpose Flour | Almond Flour | 1:1 | Denser, nuttier crumb |
| Buttermilk | Milk + 1 tbsp Lemon Juice | 1 cup + 1 tbsp | Same acidity, slightly thinner |
| Heavy Cream | Half-and-Half + Butter | 3/4 cup + 1/4 cup melted | Slightly less rich, works in cooking |
| Eggs (for binding) | Mashed Banana or Applesauce | 1/4 cup per egg | Adds sweetness and moisture |
Serve and store it
Let the roast rest for 15 minutes before carving. This allows the juices to redistribute, ensuring every slice stays moist. While the meat rests, use a chef’s knife to chop the fresh herbs for the garnish. A sharp blade, like the Shun Classic or Wusthof Classic Ikon, gives you clean cuts without crushing delicate leaves.
Store leftovers in shallow airtight containers within two hours of cooking. The dish keeps well in the refrigerator for up to three days. For longer storage, freeze portions for up to three months. Label each container with the date so you can track freshness.
Reheat gently to preserve texture. Warm the dish in a covered skillet over low heat with a splash of broth or water. Avoid the microwave, which can toughen the meat and dry out the vegetables. If the sauce thickens too much, add a little more liquid until it reaches your desired consistency.
Kitchen knives: what to check next
Choosing a knife involves balancing edge retention, handling comfort, and maintenance. The following answers address the most common practical concerns before you make a purchase.
No comments yet. Be the first to share your thoughts!